Thursday, 11 April 2013

Depth of Field


Camera Models

Pinhole lens


The pinhole camera (also called the camera obscura) is an imaging device that only lets a single ray of light through. It is usually a box with a small hole in the centre that allows light through that hole. The image that is shown inside the box is upside down.


With thin lens, the rays can be split into more than one ray.

What is Depth of Field????

It is the amount of distance between a focused object relative to the background objects behind it. In other words, any object that is not the focus of the camera gets blurred. In this way you can place more attention to the focused object or person in an image. Photographers in general use this technique in order to point out what exactly they want their viewers to pay attention to. As you can see in the picture below, at first glance you will only look a the focused coloured pencil. At least, I did the first time. Everything else in the picture is blurred. The person who took this picture probably wanted viewers to identify the blue coloured pencil.

Three factors relate to depth of field:

  • diaphragm opening of lens (aperture)
  • focal of length
  • image size
When implementing depth of field the per-pixel depth and blur information is stored in the alpha channel.You will also need pixel shaders to perform down-sampling on the image, use filter kernel to approximate circle of confusion, and for blending.

In the post-processing shader, the camera distance of three planes are passed.

  • Focal plane
  • Near plane
  • Far plane


Alpha Blending

This is creating a new colour by blending a translucent foreground colour with a background colour. It is used to display a transparent sort of pixelated image. It can also be used for a 3D atmospheric effect.  As you can see in the picture below, there are three images with the last one being the alpha blended one because you can see both the first and second image blended together.


When performing depth of field in your 3D scene, you need to store your per-pixel depth and blurriness information into the alpha channel. 

Circle of Confusion

Circle of Confusion or Disk of Confusion refers to the area of the depth of field that is not blurred. It represents the most focused part of the image. It is also shown in the shape of cones which represents the light rays that pass through the lens.


Artist Q1


My new screenshots that I have sown to my teachers for homework were the following images below.


These images are taken from the game my group and I made last semester.


Here is what they look like afterwards. I have applied blurring on the first image on the right. Toon shading on the second image . And bloom on the third.

Relatively you can look at these pictures at first glance and say, "This is the work of Photoshop". However, these screenshots can be done through, the one and only "Shaders".

Yes, shaders can perform these same tasks as Photoshop. But how??? Let me draw up some diagrams and show you.


Toon & Bloom Diagram

In the toon diagram, all of the varyings, positions, and such are going to be passed into the fragment shader. within the fragment shader, all lighting, colour, and position is going to be calculated using the information provided in the vertex shader. Also, there is another shader that can be used and will prove to be very useful.


The edge shader is another type of shader that calculates each pixel relative to its edge or by the extreme differences of the lighting throughout the image. It uses the Sobel_operator in order to implement it.

Here is an example.


float Sobel_Horiz(sampler2D image, vec2 texcoord)
{
vec2 ps= pixelSize;
vec2 offset[6]= vec2[](vec2(-ps.s, -ps.t), vec2( ps.s, -ps.t),
vec2(-ps.s, 0.0), vec2(ps.s, 0.0),
vec2(-ps.s,ps.t),vec2(ps.s, ps.t));

vec3 sum= vec3(0.0);
sum+= -texture2D(image, offset[0]+texcoord).rgb;
sum+= texture2D(image, offset[1]+texcoord).rgb;
sum+= -2.0*texture2D(image, offset[2]+texcoord).rgb;
sum+= 2.0*texture2D(image, offset[3]+texcoord).rgb;
sum+= -texture2D(image, offset[4]+texcoord).rgb;
sum+= texture2D(image, offset[5]+texcoord).rgb;

float lenSq= dot(sum, sum);
return (lenSq< 1.0 ? 1.0: 0.0);

}


Blur Diagram

In gaussian blurring there are two passes. You have to compute the horizontal texcoords and the vertical texcoords. This is why there are two vertex shaders being passed into the fragment shader.


Shadow Mapping


What is Shadow Mapping????

First of all, what are shadows? Shadows are basically shapes that appear when an object is in front of or are  in the same area of its rays. Shadow Mapping on the other hand, are the same thing except there are added on a 3D computer graphics scene.

Shadows in general are a great use for images, films, and video games. They give realism, adds character, mood, and also gives people a sense of environment and depth when  looking upon a screen or image. 


See the difference??? Of course you do


Algorithms of Shadow Maps

There are two rendering passes when performing shadow mapping. 

1) From the light source and the other is 
2) From the observer's view. 


Cascaded Shadow Mapping

In this type of shadow map, the camera view frustum is split and a separate depth-map is created. This in fact creates a higher resolution in a 3D image. CSM is mostly used to mimic shadow rays from the sun. Therefore, in a single frame, the entire image and everything in it has shadows of its own.


Bloom and HDR


Bloom is an effect that brightens the light areas in an image or in video games. It creates an illusion that makes bright lights seem brighter.

High Dynamic Range Rendering is the rendering of computer graphics scenes. This is a very good way to create realistic and pretty scenes in games or movies.
 

  How are Bloom Shaders Effects used in video games????

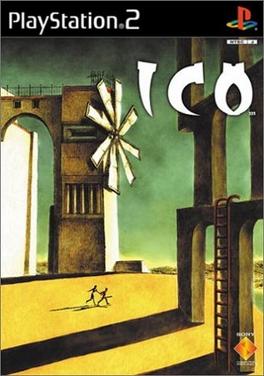
In video games, Bloom shader effects are used many times. Games like The Legend of Zelda, Twilight Princess, and many others. Ico was one of the first video games to use bloom effects.

European and Japanese PlayStation 2 box cover for Ico


What do you need in order to perform bloom???

Well, in your vertex shader you will need all the necessary information to pass into the fragment shader. Things like: attributes, uniforms, and varyings. Because you are dealing with bloom you will also need ambient, diffuse, and specular lighting as well. In your void main(), you will want to state the gl_Position = gl_ModelViewProjectionMatrix * gl_Vertex as well as your definitions of your variables which you listed as your attributes, uniforms, and varyings.

Your fragment shader, is where you can do the fun stuff. This is where you can calculate the lights, colour, and the position and implement them into your program.


An example is given here.


void main ()
{
    // vWorldNormal is interpolated when passed into the fragment shader.
    // We need to renormalize the vector so that it stays at unit length.
    vec3 normal = normalize(vWorldNormal);

    vec3 colour = Material.Ambient;
    for (int i = 0; i < 4; ++i)
    {
        if ( i >= NumLight )
            break;
        
        // Calculate diffuse term
        vec3 lightVec = normalize(Light[i].Position - vWorldVertex.xyz);
        float l = dot(normal, lightVec);
        if ( l > 0.0 )
        {
            // Calculate spotlight effect
            float spotlight = 1.0;
            if ( Light[i].Type == 1 )
            {
                spotlight = max(-dot(lightVec, Light[i].Direction), 0.0);
                float spotlightFade = clamp((Light[i].OuterCutoff - spotlight) / (Light[i].OuterCutoff - Light[i].InnerCutoff), 0.0, 1.0);
                spotlight = pow(spotlight * spotlightFade, Light[i].Exponent);
            }
            
            // Calculate specular term
            vec3 r = -normalize(reflect(lightVec, normal));
            float s = pow(max(dot(r, vViewVec), 0.0), Material.Shininess);
            
            // Calculate attenuation factor
            float d = distance(vWorldVertex.xyz, Light[i].Position);
            float a = 1.0 / (Light[i].Attenuation.x + (Light[i].Attenuation.y * d) + (Light[i].Attenuation.z * d * d));
            
            // Add to colour
            colour += ((Material.Diffuse.xyz * l) + (Material.Specular * s)) * Light[i].Colour * a * spotlight;
        }
    }
    
    gl_FragColor = clamp(vec4(colour, Material.Diffuse.w), 0.0, 1.0);// * texture2D(Sample0, vUv);
}


When you are finished with all of that, you can get something like this.

 Pretty cool right.


Monday, 8 April 2013

Tooooon Shading!!!!!


Toon Shading or Cel Shading is a type of a non-photo-realistic illumination that makes models look hand-drawn. 

In my own opinion, the word 'Toon' comes from the word cartoon which is the easiest way to draw. You usually see many examples of 2D toon shading in film companies like Disney and Pixar. However, in video games, toon shading is used many of the games such as Bastion, Legend of Zelda, Ultimate Spiderman, and Prince of Persia.

Speaking of games, did you know the Doctor Hauzer was the first video game to incorporate cel shading into its graphics? Yes indeed. In 1994, this game introduced the first early example of cel shading. Doctor Hauzer began a new and improved way of game art and thus started the trend. It was also the first 3D survival horror game in history. 


In 1999, Fear Effect became the well known 3D video game to receive notification for using cel shading in their graphics. So in other words they took all the glory from Doctor Hauzer. They took cel shading to the next level and as a result they caught everyone's attention.


As you can see in all of the examples, toon shading is basically taking a 3D image and making it look like a cartoon or a comic book picture.

Here is the one I did for one of my homework questions. Pretty cool right!!!


Here is a small piece of code taken from the fragment shader.

void main()
{
float diffuse = max(0.0, dot(n, lightEyeDirection));
float blocky = texture2D(qmap, vec2(diffuse, 0.5)).r;
vec3 c = texture2D(inputImage, texcoord).rgb;
gl_FragData[0].rgb = c*lines;
gl_FragData[1].rgb = n*1.0+1.0 + lightEyeDirection;
}

Gooch Shading

Now gooch shading is another type of non-photo-realistic shading. It gives out the black outlines too but it also computes a light source and two tone shades are included into the image to notify the curves or bends of the object. 


In my opinion, Toon/Cel shading is the most simplest non-photo-realistic thing to code and in addition, you will know when it is working when you run it in your program.


Sunday, 7 April 2013

Ambient Occlusion


What is Ambient Occlusion????

Ambient Occlusion is a 3D shader technique that creates realism into your model.
In other words, it makes your model/scene look  more REALISTIC.

Ambient occlusion is a type of global illumination technique that creates soft shadows on objects especially in the corners. It calculates the light and its relationship with an object based on the distance. This is the reason why scenes have a more realistic look with ambient occlusion (hence the term ambient light meaning normal lighting). It depicts the way light reflects off of an object

Here is an example of ambient occlusion in Maya


In the photo above you can see the necessary shadows and highlights which give the image a more REALISTIC look. There are soft shadows in the corners of the room as well as on the inside corners of the shelf. Overall, the image has depth and realism.

Here is another image to further show the difference between an average picture without ambient occlusion (left) and a picture with ambient occlusion (right). The image with AO is just simple and plain. Also, there are no shadows between the telephone and the wall and on the corner of the wall which makes the image look fake. In the other image there is indeed a soft shadow in the corner of the wall and between the telephone and the wall


Here is my own model that I have done on Maya.

The image on the left features a simple scene without ambient occlusion.


The next image shows the scene in Maya in rendering mode using ambient occlusion. The wonderful thing about Maya is that it gives you its own texture which will be helpful when making games.


If you want to try making your own ambient occlusion scene in Maya you can take a  look at this video.


Who uses AO???

Well this is a simple answer--- video games. Video games such as Gears of War 2, Batman: Arkham City, and Halo: Reach are just a few examples of video games that use ambient occlusion. So if you were wondering how do they make there games look so real, well here is one of the answers. Ambient Occlusion makes your games look REAL. 


However, games are not the ones who use ambient occlusion. Many traces of ambient occlusion can be seen in movies as well. The image below is a picture of  the innocent robot WALL-E from the Pixar movie WALL-E. He looks just like any ordinary rendered Maya scene. Pretty cool huh.